
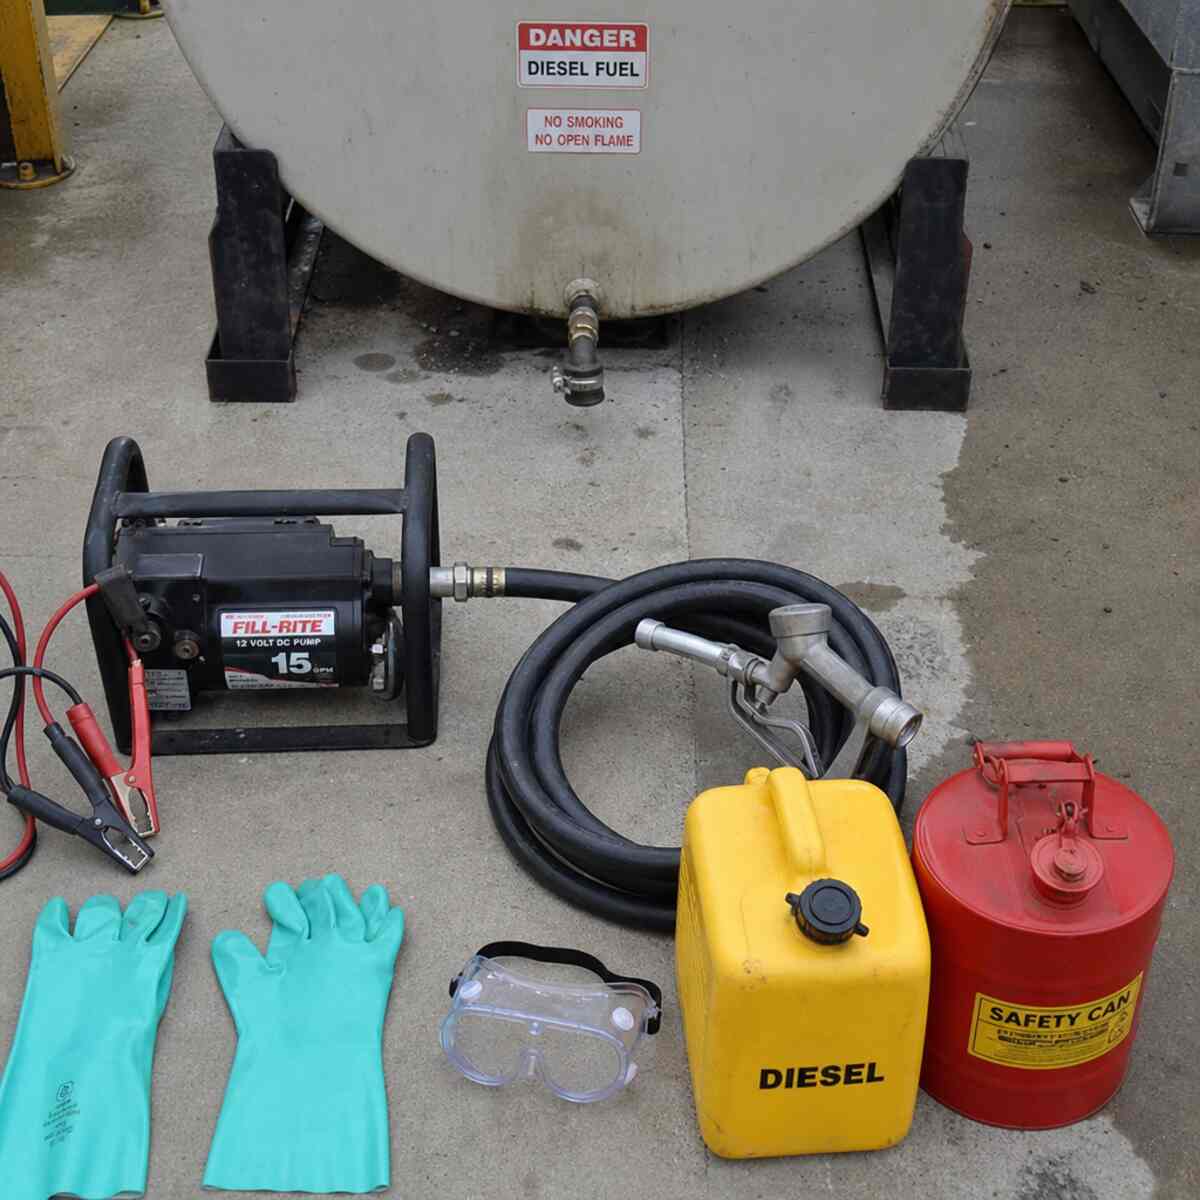
Tools Needed for Fuel Tank Drainage
Draining a fuel tank sounds simple until you consider the risks: fuel vapors, static electricity, contaminated liquid, awkward access points, stubborn fittings, and disposal rules. The right tools make the job cleaner, safer, and more controlled. The wrong tools can turn a routine maintenance task into a fire hazard, environmental problem, or expensive repair. Uncover the best info about Fuel Tank Drain.
This guide walks you through the tools needed for a Fuel Tank Drain, how to choose them, and how to use them in a practical step-by-step workflow. It also explains when draining is appropriate, when fuel tank cleaning should follow, and when the smartest tool is a qualified professional.
Safety disclaimer: Fuel is highly flammable, vapors can ignite quickly, and some fuels are toxic to inhale or touch. This article is for general educational purposes only. Always follow the vehicle, equipment, or tank manufacturer’s instructions; use approved fuel-handling equipment; work in a legal, well-ventilated area; and contact a certified technician if you are unsure. Never smoke, use open flames, create sparks, drill into a tank, or siphon fuel by mouth.
First, know what kind of fuel tank you are draining
Before choosing tools, identify the tank and fuel type. A small lawn equipment tank, motorcycle tank, boat tank, generator tank, diesel storage tank, and modern vehicle tank may all require different access points and safety precautions.
Common situations include:
- Old or contaminated fuel: Fuel has sat too long, smells sour, contains water, or has visible debris.
- Wrong fuel added: gasoline in a diesel tank, diesel in a gasoline tank, or other fluid contamination.
- Tank removal or repair: You need the tank empty before dropping it or replacing parts.
- Fuel tank cleaning: You are draining the tank as the first step before removing sludge, rust, sediment, or microbial contamination.
- Storage or seasonal service: Fuel needs to be removed before long-term storage or equipment transport.
If the tank is part of a modern vehicle, be especially cautious. Many vehicles have anti-siphon features, complex fuel pump modules, rollover valves, vapor recovery systems, and pressurized fuel lines. For some models, the correct procedure is not to push a hose down the filler neck, but to access the fuel pump module, drain plug, service port, or fuel line per the manufacturer’s instructions.
Quick answer: what tools do you need to drain a fuel tank?
For most safe fuel drainage jobs, the core tool kit includes:
- Approved fuel transfer pump
- Fuel-rated hose or tubing
- Approved fuel storage containers
- Personal protective equipment
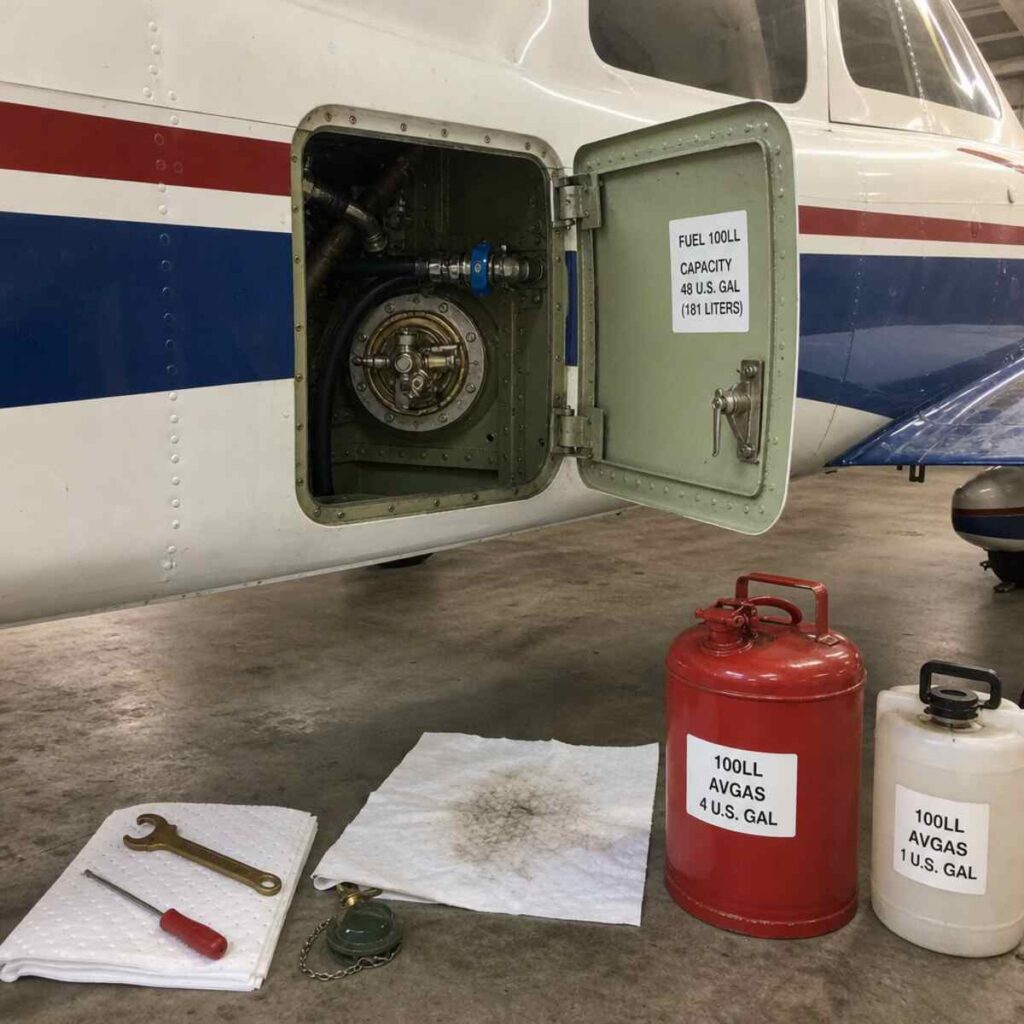
- Absorbent pads or spill kit
- Basic hand tools
- Flashlight or intrinsically safe work light
- Grounding and bonding equipment when appropriate
- Funnel with filter or fuel strainer
- Labels for containers
- Fire extinguisher rated for flammable liquids
- Drain pan or catch basin
- Rags, plugs, caps, and clamps
- Service manual or manufacturer instructions
- Disposal plan for old or contaminated fuel
If you came here wondering, “how do you drain a fuel tank?”, the honest answer is: safely, slowly, with the correct fuel-rated tools, and with a plan for what happens to the fuel after it leaves the tank.
Safety tools you should gather before anything else
Fuel drainage is not a “grab a hose and bucket” task. Start with safety gear before you touch the tank.
Personal protective equipment
At minimum, use:
- Chemical-resistant gloves: Nitrile gloves are common for light fuel contact, but heavier chemical-resistant gloves may be better for longer jobs.
- Safety goggles: Fuel splashes can cause serious eye irritation or injury.
- Long sleeves and work pants: Choose non-synthetic, close-fitting clothing when possible.
- Closed-toe shoes or boots: Fuel-soaked footwear is dangerous, so avoid absorbent materials.
- Respiratory protection if needed: If you are working around strong vapors or enclosed spaces, stop and improve ventilation. Specialized respirators may be required in some environments, but casual masks do not make fuel vapors safe.
Do not wear loose clothing, dangling jewelry, or anything that can catch on fittings or equipment.
Fire extinguisher
Keep a properly charged extinguisher rated for flammable liquids nearby. Do not bury it behind tools or leave it across the garage. It should be visible, reachable, and familiar to anyone helping you.
A fire extinguisher is not permission to take risks. It is a backup, not the plan.
Spill kit and absorbents
Even careful drainage can create drips. Keep these close:
- Fuel-compatible absorbent pads
- Absorbent granules designed for petroleum spills
- Disposable rags
- Sealable waste bags or containers
- Non-sparking scraper or scoop for cleanup material
Avoid washing spilled fuel into drains, soil, grass, or stormwater systems. Small spills can quickly become big environmental problems.
Ventilation equipment
Work outdoors or in a very well-ventilated area. If you use fans, make sure they are appropriate for the environment. Ordinary fans and electrical devices can be ignition sources. Do not assume that “moving air” automatically equals safe air.
If the fumes are heavy enough to make you feel dizzy, lightheaded, nauseated, or irritated, leave the area immediately.
Fuel transfer tools: pump options compared
The pump is the heart of a controlled Fuel Tank Drain. The best pump depends on fuel type, tank size, access, and whether the fuel is clean enough to reuse or contaminated enough to discard.
Manual siphon pump
A manual siphon pump is one of the simplest options for small tanks. It uses a hand bulb or plunger to start fuel movement through a hose.
Best for:
- Small engines
- Motorcycles
- ATVs
- Portable generators
- Tanks with easy access
- Low-volume fuel removal
Advantages:
- Inexpensive
- Portable
- No battery or outlet required
- Easy to control
Limitations:
- Slow for large tanks
- Not ideal for thick sludge or debris
- May not work through anti-siphon filler necks
- Requires careful hose placement
Important safety note: use a pump designed for fuel. Do not use improvised tubing or mouth suction.
Hand-crank fuel transfer pump
A hand-crank pump is useful when moving moderate amounts of fuel from drums, storage tanks, boats, or equipment tanks.
Best for:
- Diesel tanks
- Farm or jobsite equipment
- Larger portable tanks
- Controlled transfer without electricity
Advantages:
- Good flow rate without power
- Durable
- Useful in remote areas
- Better than a small siphon for larger volumes
Limitations:
- Requires physical effort
- Must be compatible with the fuel being moved
- Hose and seals must be maintained
Always confirm the pump is approved for the specific fuel. A pump suitable for water, oil, or coolant may not be safe for gasoline.
Battery-powered fuel transfer pump
Battery-powered pumps can be convenient, but they must be designed and rated for fuel transfer. This is not a place to improvise with random electric pumps.
Best for:
- Larger tanks
- Repeated service tasks
- Equipment maintenance
- Situations where speed and control matter
Advantages:
- Faster than manual pumping
- Less physical effort
- Useful for larger fuel volumes
Limitations:
- Requires correct electrical safety rating
- Battery connections can create sparks if handled carelessly
- More expensive than manual tools
- Requires more attention to grounding, hose routing, and shutoff control
Do not use shop vacs, household pumps, aquarium pumps, drill pumps, or other non-fuel-rated equipment. Fuel vapors and unsuitable motors are a dangerous combination.
Vehicle fuel pump activation tools
In some vehicles, technicians drain the tank by using the vehicle’s own fuel pump to transfer fuel through the fuel line into an approved container. This may require a scan tool, a relay bypass, a service connector, or a manufacturer-specific procedure.
Best for:
- Modern vehicles with anti-siphon filler necks
- Tanks without accessible drain plugs
- Situations where manufacturer procedures support pump-out service
Advantages:
- Avoids forcing hoses into filler necks
- Can be efficient
- Uses existing fuel pickup location
Limitations:
- Not universal
- Can damage pumps if run dry
- Requires technical knowledge
- Fuel pressure must be handled correctly
- May be unsafe without the service procedure
If you are not trained in vehicle fuel systems, this is a good point to stop and call a professional.
Hoses, tubing, and fittings
Fuel-rated hose matters. Fuel can degrade unsuitable tubing, causing leaks, softening, swelling, cracking, or contamination.
Look for:
- Hose clearly rated for gasoline, diesel, or the fuel in question
- Correct diameter for the pump and access point
- Enough length to route safely from tank to container
- Smooth interior where possible to maintain flow
- Secure clamps or fittings
- No cracks, kinks, or hardened sections
Avoid:
- Garden hose
- Vinyl tubing not rated for fuel
- Old unknown hose
- Tubing that becomes soft when exposed to fuel
- Hoses with loose fittings
A clear fuel-rated hose can help you monitor flow and identify water, sediment, or air pockets, but visibility is not a substitute for proper filtering and containment.
Fuel containers: what to use and what to avoid
The container is just as important as the pump. Fuel should only go into approved fuel containers compatible with the fuel type.
Use:
- Approved gasoline cans for gasoline
- Approved diesel containers for diesel
- Metal safety cans when appropriate
- Containers with secure caps
- Containers in good condition
- Containers with enough capacity for the expected volume
Avoid:
- Open buckets
- Glass jars
- Milk jugs
- Food containers
- Thin plastic storage bins
- Unlabeled containers
- Containers that previously held unknown chemicals
Before you begin, estimate how much fuel is in the tank. Have more container capacity than you think you need. Running out of storage halfway through drainage creates unnecessary risk.
Label every container immediately
Once fuel is removed, label the container with:
- Fuel type if known
- Whether it is clean, old, contaminated, or mixed
- Date drained
- Source tank or equipment
- Warning such as “flammable” or “contaminated fuel”
This prevents accidental reuse, mixing, or disposal mistakes.
Basic hand tools for fuel tank drainage
Depending on the tank, you may need basic hand tools to access panels, fuel lines, clamps, drain plugs, skid plates, shields, or pump modules.
Common tools include:
- Screwdrivers
- Socket set
- Wrenches
- Pliers
- Hose clamp pliers
- Fuel line disconnect tools
- Trim removal tools
- Torque wrench for reassembly
- Catch pan
- Caps and plugs for open lines
Use the correct tool for each fastener. Damaged fittings around fuel systems can lead to leaks, vapor problems, or costly repairs.
Fuel line disconnect tools
Many modern vehicles use quick-connect fuel fittings. These often require specific disconnect tools. Pulling, twisting, or prying without the right tool can break retainers or damage lines.
If a fuel line does not release easily, stop and verify the connection type.
Drain plug tools
Some tanks have drain plugs. Many do not. If yours does, use the correct wrench or socket and a catch pan large enough to handle the flow.
Never assume a plug is safe to remove without checking:
- Whether the tank is pressurized
- Whether the plug is corroded
- Whether you have enough container capacity
- Whether the fuel will splash onto hot surfaces
- Whether replacement sealing washers are needed
Do not use excessive force on a rusted or damaged drain plug. A broken plug can turn a controlled Fuel Tank Drain into an emergency leak.
Lighting tools: see clearly without creating a hazard
You need good visibility, but many ordinary lights are not ideal around fuel vapors.
Safer choices include:
- Battery-powered LED work lights designed for shop use
- Intrinsically safe flashlights for higher-risk environments
- Headlamps rated for appropriate work conditions
Avoid:
- Open-flame lights
- Halogen work lamps that become very hot
- Damaged extension cords
- Sparks from loose electrical connections
- Placing lights where fuel can drip onto them
If you smell strong vapors, improving lighting is not the priority. Stop, ventilate, and reassess.
Grounding and static control tools
Static electricity can ignite fuel vapors. Static risk depends on the fuel, container, flow rate, materials, and environment. Gasoline is especially sensitive because its vapors ignite easily.
Useful static-control tools may include:
- Bonding cables
- Grounding clamps
- Metal safety cans
- Conductive hose where required
- Manufacturer-approved transfer equipment
The general principle is to reduce static buildup by keeping containers stable, avoiding splash filling, using approved equipment, and following the pump or container manufacturer’s bonding instructions.
Do not fill containers in a vehicle trunk, truck bed liner, or on surfaces that can increase the risk of static. Keep containers on the ground when filling unless the equipment manufacturer instructs otherwise.
Tools for filtering and inspection
If the fuel may be reused, inspection and filtration tools become important. If the fuel is contaminated, do not assume filtering makes it safe or suitable.
Useful tools include:
- Funnel with built-in screen
- Fuel filter funnel
- Clear inspection jar rated for fuel use
- Water-detecting paste for certain storage tank applications
- Clean white container or tray for sediment inspection
- Borescope for internal tank inspection when safe and appropriate
When inspecting fuel, look for:
- Water separation
- Rust particles
- Cloudiness
- Sludge
- Dark color
- Sour or varnish-like smell
- Microbial growth in diesel applications
If fuel is badly degraded or mixed with another fuel type, plan for proper disposal rather than reuse.
Tools for fuel tank cleaning after drainage
Draining removes liquid fuel. It does not automatically remove sludge, varnish, rust, or sediment. If your goal is to clean the fuel tank, you may need additional tools once the tank is empty and safely prepared.
Potential fuel tank cleaning tools include:
- Approved tank cleaning solution compatible with the tank material
- Non-sparking brushes or agitation tools where appropriate
- Inspection mirror or borescope
- Low-pressure rinse equipment approved for the cleaning method
- Drying equipment suitable for the tank and environment
- Replacement filters
- New seals, gaskets, or O-rings
- Fuel-safe plugs and caps
Avoid aggressive methods unless specified by the manufacturer. Some tanks have internal coatings, baffles, sensors, plastic components, or fuel pump assemblies that can be damaged by harsh chemicals or scraping.
For large, underground, marine, aviation-related, or heavily contaminated tanks, hire a specialist. Confined spaces and fuel vapors can be deadly.
Pre-job checklist: gather these before you start
Before asking “how do you drain a fuel tank,” ask “am I fully prepared to control the fuel from start to finish?”
Your pre-job checklist should include:
- Approved pump for the fuel type
- Fuel-rated hose
- Approved containers with enough capacity
- Safety goggles
- Chemical-resistant gloves
- Fire extinguisher
- Spill kit
- Absorbent pads
- Labels and marker
- Basic hand tools
- Fuel line disconnect tools if needed
- Drain pan or catch basin
- Caps and plugs
- Manufacturer instructions
- Disposal or recycling plan
- Clear work area
- Ventilation plan
- No ignition sources nearby
- A second person nearby for larger or riskier jobs
If you are missing any critical safety item, do not start.
Step-by-step: how to prepare for a Fuel Tank Drain
The preparation phase is where you prevent most problems.
Step 1: Read the service information
Check the owner’s manual, service manual, equipment manual, or manufacturer guidance. Look for:
- Recommended drainage method
- Fuel system pressure warnings
- Tank access points
- Fuel pump relay or fuse information
- Drain plug location if present
- Required replacement seals
- Torque specifications
- Disposal instructions
If the procedure requires special tools or pressurized fuel system service, do not guess.
Step 2: Choose the safest work location
Work in a place that is:
- Well ventilated
- Away from flames, heaters, pilot lights, welding, grinding, and smoking
- Away from drains and waterways
- Flat and stable
- Bright enough to see clearly
- Protected from children, pets, and bystanders
Do not drain fuel near appliances with pilot lights, including water heaters or furnaces. Vapors can travel along the floor and ignite away from the tank.
Step 3: Let hot equipment cool
If the engine or equipment was running, allow it to cool. Hot exhaust, engine components, or electrical parts can ignite fuel or vapors.
Step 4: Reduce fuel level if possible
If safe and appropriate, running the equipment until the fuel level is lower can reduce the amount you need to drain. However, do not run an engine that contains the wrong fuel, contaminated fuel, or fuel that may damage the system.
Step 5: Disconnect power sources when instructed
For vehicles and powered equipment, follow the manufacturer’s instructions for disconnecting the battery or disabling the fuel pump. Be careful: disconnecting a battery may affect electronic settings, security systems, or service procedures.
Step 6: Relieve fuel system pressure if required
Fuel-injected systems may hold pressure. Releasing pressure incorrectly can spray fuel. Follow the manufacturer’s procedure or hire a technician.
Step 7: Position containers and spill protection
Place absorbent pads under the work area. Put approved containers close enough to avoid straining the hose, but not where they can tip or block your escape route.
Open only one container at a time when possible. Keep caps ready.
Step-by-step: how to drain a small accessible fuel tank
Small tanks are common on lawn mowers, generators, motorcycles, pressure washers, and similar equipment. Even with small volumes, treat the job seriously.
Step 1: Confirm the tank is cool and accessible
Make sure the equipment is off, cool, stable, and outdoors or in a well-ventilated area.
Step 2: Inspect the fuel
If you can safely see into the tank, check for debris, water, rust, or varnish. Do not use a lighter, match, or open flame to see inside.
Step 3: Insert the fuel-rated hose
Place the intake hose into the lowest safe point of the tank. Avoid forcing the hose against screens, baffles, or delicate pickup components.
Step 4: Route the outlet hose into an approved container
Keep the outlet hose secured so it cannot jump out when fuel begins flowing. A clamp or helper may be useful.
Step 5: Pump slowly
Start the manual pump and watch the hose, container, and tank. Slow, controlled flow is better than speed.
Step 6: Stop before overflow
Do not fill containers to the brim. Leave expansion space and cap containers promptly.
Step 7: Remove final residue carefully
A small amount of fuel may remain at the bottom. Depending on the tank and your purpose, you may use a fuel-rated suction pump, remove the tank, or proceed with manufacturer-approved cleaning.
Step 8: Label and store the drained fuel temporarily
Label the container and keep it in a safe, legal location until reuse or disposal.
Step-by-step: how to drain a vehicle fuel tank safely
Vehicle tanks can be more complicated than small tanks. If you are not experienced, do not treat this as a casual DIY job.
Step 1: Identify the correct drainage method
Common vehicle methods may include:
- Pumping through the filler neck, if the design allows
- Draining through a tank drain plug, if present
- Accessing the fuel pump module
- Disconnecting a fuel line using approved tools
- Using the vehicle’s pump according to service procedures
- Removing the tank after reducing the fuel level
Modern vehicles often prevent simple siphoning. Do not force tools past anti-siphon devices or rollover valves.
Step 2: Prepare for pressurized fuel
If the vehicle uses fuel injection, the system may be pressurized. Wear eye protection and follow the pressure relief procedure.
Step 3: Raise the vehicle only if necessary
If you need access underneath, use proper lifting equipment:
- Floor jack rated for the vehicle
- Jack stands rated for the vehicle
- Wheel chocks
- Flat, stable surface
Never rely on a jack alone. Never work under a vehicle supported only by a jack.
Step 4: Protect against spills
Position absorbent pads and a drain pan under likely leak points. Have caps and plugs ready for disconnected lines.
Step 5: Connect fuel-rated transfer equipment
Use only fuel-compatible hose, fittings, and pump equipment. Confirm the outlet hose is secured in an approved container.
Step 6: Transfer fuel in controlled batches
If the tank contains a lot of fuel, drain into multiple approved containers. Cap and move filled containers to a safe nearby location before continuing.
Step 7: Do not run pumps dry
Fuel pumps can overheat or be damaged if run dry. Stop when flow becomes inconsistent or when the manufacturer procedure says to stop.
Step 8: Check for leaks before reassembly
After drainage, reconnect fittings correctly. Replace seals or clips if required. When the system is refilled, inspect carefully for leaks before driving.
Step-by-step: how to drain a diesel tank
Diesel is less volatile than gasoline, but it is still a combustible petroleum product and should be handled carefully. Diesel tanks can also develop water contamination, sludge, and microbial growth.
Step 1: Use diesel-compatible tools
Confirm the pump, hose, seals, and containers are compatible with diesel. Some equipment may be rated for diesel but not gasoline, or vice versa.
Step 2: Check for water and sludge
Diesel contamination often settles near the bottom of the tank. If your goal is to clean the fuel tank, draining the top layer alone is not enough.
Step 3: Draw from the lowest practical point
When possible, remove water and sediment from the low point of the tank. For large tanks, this may require a bottom drain, a sampling port, or professional fuel-polishing equipment.
Step 4: Filter only when appropriate
Lightly contaminated diesel may sometimes be filtered or polished using specialized equipment, but badly degraded fuel should not be returned to service without proper evaluation.
Step 5: Replace filters after contamination
If contaminated diesel has reached the engine or equipment fuel system, replace fuel filters and inspect related components according to manufacturer guidance.
Step-by-step: draining before fuel tank cleaning
If the real goal is fuel tank cleaning, drainage is only the first stage. Here is a safe, practical sequence.
Step 1: Drain the usable liquid fuel
Remove fuel using the safest approved method for the tank type. Keep clean fuel separate from contaminated fuel.
Step 2: Remove access components if required
This may include the fuel pump module, sender unit, inspection cover, or tank cap assembly. Replace seals during reassembly if the manufacturer recommends it.
Step 3: Inspect the tank interior
Use a safe light source, inspection mirror, or borescope. Look for:
- Rust
- Sediment
- Sludge
- Varnish
- Water pockets
- Damaged baffles
- Cracked plastic
- Flaking internal liner
- Loose debris
Step 4: Choose a cleaning method compatible with the tank
Plastic, steel, aluminum, and coated tanks may require different cleaning methods. Harsh chemicals can damage seals, coatings, sensors, or plastic components.
Step 5: Remove debris without creating sparks
Use non-sparking tools where needed. Avoid grinding, scraping with improper tools, or using compressed air in ways that spread vapors or contamination.
Step 6: Dry the tank completely if required
Moisture left inside the tank can cause corrosion or fuel contamination. Drying must be done safely, with attention to vapors and static.
Step 7: Replace filters and seals
A clean tank can still send old contamination into the fuel system if filters, lines, or pickup screens remain dirty.
Step 8: Refill with clean fuel and test carefully
After reassembly, add a small amount of clean fuel first. Check for leaks, odors, and proper operation before filling completely.
Tool comparisons: choosing the right setup for your situation
Because every tank is different, the “best” toolkit varies by job. Use these comparisons to choose wisely.
For a small lawn mower or generator tank
Recommended setup:
- Manual fuel siphon pump
- Short fuel-rated hose
- Small approved fuel can
- Gloves and goggles
- Absorbent pads
- Funnel with screen
Why this works:
- Low volume
- Easy access
- Simple tank shape
- Minimal need for powered transfer equipment
Avoid:
- Pouring fuel by tipping heavy equipment awkwardly
- Using open bowls or household containers
- Siphoning by mouth
For a motorcycle or ATV tank
Recommended setup:
- Manual pump or small fuel transfer pump
- Fuel-rated hose
- Approved fuel container
- Basic hand tools
- Catch pan
- Replacement fuel line clips if needed
Why this works:
- Moderate access
- Smaller tank volume
- Possible petcock, fuel line, or pump access depending on design
Avoid:
- Damaging painted surfaces with fuel spills
- Pulling hoses without loosening clamps
- Reusing cracked fuel lines
For a modern car or truck
Recommended setup:
- Manufacturer service information
- Fuel line disconnect tools
- Approved fuel transfer pump
- Fuel-rated hose and fittings
- Large approved containers
- Spill kit
- Fire extinguisher
- Jack stands and wheel chocks if under-vehicle access is needed
Why this works:
- Vehicle systems are more complex
- Fuel may be pressurized
- Anti-siphon devices may block filler-neck drainage
- Correct access reduces damage risk
Avoid:
- Forcing hoses down the filler neck
- Using non-rated electric pumps
- Disconnecting fuel lines without pressure relief
- Working under a vehicle without proper support
For a boat fuel tank
Recommended setup:
- Marine-appropriate fuel transfer equipment
- Approved fuel containers
- Ventilation plan
- Spill containment materials
- Fuel-water separator tools
- Professional help for built-in tanks
Why this works:
- Marine environments increase spill and vapor concerns
- Built-in tanks can be difficult to access
- Fuel contamination with water is common
Avoid:
- Draining near water without containment
- Letting fuel enter the bilge
- Ignoring marine-specific safety requirements
For a large storage tank
Recommended setup:
- Professional fuel transfer pump
- Bonding and grounding equipment
- Large approved containers or service truck
- Sampling tools
- Spill response kit
- Fuel polishing or tank cleaning service if contaminated
Why this works:
- Large volumes magnify every risk
- Static control and spill planning matter more
- Waste handling may be regulated
Avoid:
- Treating large tank drainage as a DIY task
- Using undersized containers
- Draining without a disposal plan
Common mistakes to avoid
Using the wrong pump
A water pump, shop vac, drill pump, or household pump may not be safe for fuel. Fuel-rated equipment is not optional.
Using open containers
Fuel vapors escape easily from open buckets or pans. Use approved containers with secure caps.
Working near ignition sources
Pilot lights, heaters, cigarettes, grinders, extension cord sparks, and hot lights can ignite vapors. Remember that vapors may travel away from the tank.
Forgetting about static electricity
Static discharge can occur when fuel flows through hoses or into containers. Use approved containers and follow bonding instructions when required.
Overfilling containers
Fuel expands. Leave headspace and cap containers promptly.
Mixing unknown fuels
If you drain gasoline contaminated with diesel, water, or cleaning chemicals, do not mix it with clean fuel. Keep it labeled and separate.
Reusing bad fuel
Old or contaminated fuel can damage pumps, injectors, carburettors, filters, and engines. When in doubt, dispose of it properly.
Skipping fuel tank cleaning when contamination remains
If the tank contains sludge, rust, or water, simply draining it may not solve the problem. The next refill can stir up contamination in the fuel system.
Ignoring seals and gaskets
Fuel system seals can swell, crack, flatten, or tear. If you remove a pump module, sending unit, or drain plug, inspect seals carefully and replace them when needed.
What to do with drained fuel
Drained fuel needs a plan. Clean fuel from a known source may be reusable in some situations, but old, contaminated, mixed, or water-laden fuel should be handled as waste.
Good practices include:
- Keep drained fuel in approved, labeled containers.
- Store it away from ignition sources.
- Do not pour fuel onto the ground.
- Do not pour fuel into drains or toilets.
- Do not mix fuel with household trash.
- Contact local waste facilities, recycling centers, repair shops, or hazardous waste programs for disposal options.
If you are not sure whether the fuel is reusable, treat it as contaminated.
How to tell if fuel is too contaminated to reuse
Fuel may be unsuitable if you notice:
- Strong varnish or sour odor
- Dark color
- Cloudiness
- Visible water layer
- Floating debris
- Rust particles
- Sludge
- Unknown chemical contamination
- Wrong fuel mixed in
- Fuel that has been stored in an unapproved container
Reusing questionable fuel can cost more than replacing it. Filters and injectors are not designed to rescue severely contaminated fuel.
Special notes for gasoline tanks
Gasoline vapors are highly flammable. Treat gasoline drainage as a high-risk task even when the tank is small.
Use:
- Gasoline-rated pump
- Gasoline-approved containers
- Proper ventilation
- Static-control practices
- Fire extinguisher
- No-spark work habits
Avoid:
- Household electrical devices
- Open containers
- Hot work nearby
- Mouth siphoning
- Drilling or puncturing the tank
- Working in a basement or enclosed space
If a gasoline tank is damaged, leaking, swollen, heavily rusted, or contaminated with unknown chemicals, call a professional.
Special notes for diesel tanks
Diesel drainage often involves water, sediment, or biological growth. The fuel may look usable at the top while contamination sits at the bottom.
Useful tools for diesel work include:
- Diesel-rated pump
- Fuel-water separator funnel
- Sampling container
- Water-detecting tools were appropriate
- Replacement fuel filters
- Tank cleaning equipment if sludge is present
If diesel equipment has been run with contaminated fuel, draining the tank alone may not be enough. Lines, filters, injectors, and pumps may need inspection.
Special notes for plastic fuel tanks
Plastic tanks are common in modern vehicles and equipment. They resist rust but can still hold sludge, sediment, and degraded fuel.
Be careful with:
- Harsh solvents
- Sharp tools
- Excessive heat
- Over-tightening fittings
- Damaging molded nipples or pump module openings
Plastic tanks can be awkwardly shaped, with low spots that trap fuel. A flexible fuel-rated suction hose may help, but avoid forcing it into areas where it can get stuck.
Special notes for metal fuel tanks
Metal tanks may corrode, especially when water has been present. Drainage may reveal rust flakes, pinholes, or weak seams.
Helpful tools include:
- Inspection light or borescope
- Magnet for external rust inspection, where appropriate
- Fuel-safe catch pan
- Replacement drain plug washer, if applicable
- Rust-compatible cleaning products approved for the tank
Do not weld, grind, cut, or heat a fuel tank unless it has been professionally cleaned and certified safe for hot work. Empty tanks can still contain explosive vapors.
When a professional should handle the job
Call a professional if:
- The tank contains gasoline, and access is difficult.
- The vehicle has a pressurised fuel injection system, and you lack service information.
- The tank is large or nearly full.
- The fuel is contaminated with unknown chemicals.
- The tank is leaking, damaged, or corroded.
- You smell heavy vapors that do not clear with ventilation.
- The fuel is in a boat, an underground tank, a commercial storage tank, or a confined space.
- You need to remove the tank from a vehicle.
- You are unsure how to dispose of the fuel legally.
- The job requires activating the electrical pump, using scan tools, or disconnecting the fuel line.
Professional service may cost more upfront, but it can prevent fire risk, environmental cleanup costs, vehicle damage, and personal injury.
Troubleshooting: when fuel will not drain
The hose will not go into the tank
Possible causes:
- Anti-siphon device
- Rollover valve
- Filler neck bend
- Internal screen
- Hose diameter too large
What to do:
- Stop forcing the hose.
- Check the service information.
- Use another approved access point.
- Consider professional drainage.
The pump will not prime
Possible causes:
- Air leak in hose or fittings
- Hose not submerged
- Pump installed backward
- Tank level too low
- Clogged hose or pickup
What to do:
- Check connections.
- Confirm hose placement.
- Inspect for kinks.
- Use the correct pump orientation.
- Replace damaged hose.
Flow stops before the tank is empty
Possible causes:
- Hose lifted above fuel level
- Internal baffle blocking pickup
- Debris clogging intake
- Pump losing prime
- Tank shape trapping fuel in low spots
What to do:
- Reposition the hose gently.
- Use a smaller fuel-rated suction hose if appropriate.
- Access the tank through the manufacturer-approved opening.
- Do not tip heavy vehicles or equipment dangerously.
Fuel contains water or sludge
Possible causes:
- Condensation
- Poor storage
- Damaged cap or vent
- Long-term sitting
- Contaminated supply fuel
What to do:
- Keep contaminated fuel separate.
- Do not reuse without proper evaluation.
- Clean the tank if contamination remains.
- Replace filters.
You smell fuel after reassembly
Possible causes:
- Loose fitting
- Damaged seal
- Cracked hose
- Improper cap installation
- Fuel spilled on surfaces
- Vapor system issue
What to do:
- Stop using the equipment.
- Ventilate the area.
- Inspect for leaks only when safe.
- Replace damaged parts.
- Get professional help if the odor continues.
The ideal tool kit for a controlled Fuel Tank Drain
If you want one practical, well-rounded kit, build it around safety and compatibility.
Essential tools
- Fuel-rated manual or electric transfer pump
- Fuel-rated hose in suitable sizes
- Approved fuel containers
- Chemical-resistant gloves
- Safety goggles
- Fire extinguisher
- Spill kit
- Absorbent pads
- Funnel with filter screen
- Labels and permanent marker
Helpful add-ons
- Fuel line disconnect kit
- Hose clamp pliers
- Caps and plugs assortment
- Borescope
- Fuel sampling jar
- Water-separating funnel
- Bonding cable and clamps
- Torque wrench
- Replacement seals and gaskets
Professional-grade tools
- Vehicle scan tool for pump activation
- Fuel pressure gauge and relief tools
- Explosion-safe or fuel-rated transfer pump system
- Fuel polishing equipment
- Large-volume approved transfer tanks
- Specialized tank cleaning equipment
Choose based on the job, not the biggest tool list. A small generator does not need a commercial transfer system, and a modern vehicle should not be handled with improvised tools.
How to work cleanly and efficiently
A clean fuel drainage process is easier, safer, and less stressful.
Use these habits:
- Lay out tools before opening the tank.
- Keep containers capped until needed.
- Use absorbent pads under hose connections.
- Move slowly when disconnecting lines.
- Keep one hand on the hose during transfer if needed.
- Stop pumping before containers are full.
- Cap containers immediately.
- Wipe drips promptly with absorbent materials.
- Keep contaminated rags in a safe container.
- Recheck the area for odors before leaving.
Efficiency does not mean speed. It means fewer surprises.
After draining: inspection and next steps
Once fuel is removed, decide what the tank needs next.
If the fuel was clean
You may only need to:
- Replace a part
- Complete a repair
- Reinstall components
- Refill with fresh fuel
- Check for leaks
If the fuel was old
You may need to:
- Dispose of the old fuel
- Add fresh fuel
- Replace filters
- Clean carburetor components if affected
- Inspect fuel lines
If the fuel was contaminated
You may need to:
- Perform fuel tank cleaning
- Remove sludge or water
- Replace filters
- Flush lines where appropriate
- Inspect pumps and injectors
- Prevent recurrence by fixing caps, vents, or storage issues
If the wrong fuel was added
Do not run the engine. Drain the tank using the correct method, keep the mixed fuel separate, and follow manufacturer guidance. If the engine was started, professional diagnosis may be needed.
Practical example: choosing tools for a contaminated tank
Imagine a vehicle sat for a long time and now the fuel smells stale. You suspect sediment in the tank. A smart tool plan would include:
- Manufacturer service information
- Approved fuel transfer pump
- Fuel-rated hose
- Multiple approved fuel containers
- Spill kit and absorbent pads
- Goggles and gloves
- Fuel line disconnect tools, if required
- Funnel with filter screen for inspection only
- Replacement fuel filter
- New pump module seal if opening the tank
- Disposal plan for old fuel
The goal is not just to drain the tank. The goal is to prevent contaminated fuel from returning to the system.
Practical example: choosing tools after wrong fuel is added
If the wrong fuel goes into a tank, do not start the engine. Your tool plan should focus on isolation and complete removal.
You may need:
- Approved containers labeled as mixed fuel
- Fuel transfer pump rated for the fuel involved
- Service information for the tank design
- Fuel line disconnect tools
- Spill kit
- Replacement fuel filter
- Professional help if the engine was started
Do not blend mixed fuel into another tank unless a qualified professional confirms it is safe and legal. In most DIY situations, treat it as waste.
Practical example: choosing tools for seasonal equipment
For a small seasonal engine, such as a mower or generator, the tool list can be simple:
- Manual fuel siphon pump
- Small approved gasoline container
- Gloves
- Goggles
- Absorbent pad
- Funnel screen
- Label
After draining, you may still need to run the carburetor dry or follow the manufacturer’s storage procedure. Some equipment is stored best with stabilized fuel, while other equipment may need fuel removed. Follow the manual.
Frequently asked questions
How do you drain a fuel tank without making a mess?
Use a fuel-rated transfer pump, secure both ends of the hose, place absorbent pads under connections, and drain into approved containers with enough capacity. Work slowly and stop before containers are full. Most messes happen because the container is the wrong one, the hose is unsecured, or the job starts without a spill plan.
Can I use any hose to drain fuel?
No. Use hose rated for the fuel you are handling. Unsuitable hose can soften, leak, crack, or contaminate fuel.
Can I drain gasoline into a bucket temporarily?
No. Use approved fuel containers. Open buckets allow vapors to escape and can spill easily.
Is a manual siphon pump safe?
A manual siphon pump can be safe for small jobs if it is designed for fuel, used with approved containers, and operated away from ignition sources. Never start a siphon by mouth.
Why won't my car's tank siphon through the filler neck?
Many modern vehicles have anti-siphon devices, rollover valves, screens, or filler-neck designs that block access to the hose. Use the manufacturer-approved drainage method.
Do I need to clean the fuel tank after every drain?
No. If the fuel is clean and the tank is being drained only for a repair, cleaning may not be necessary. If you see sludge, rust, water, varnish, or debris, fuel tank cleaning may be needed.
Can old fuel be reused?
Sometimes clean fuel from a known source may be reused, but old, stale, contaminated, mixed, or water-laden fuel should not be reused without proper evaluation. When in doubt, dispose of it properly.
What is the safest Fuel Tank Drain method?
The safest method is the one recommended by the manufacturer, using approved fuel-handling tools, proper ventilation, spill control, static precautions, and approved containers. For complex tanks, the safest approach is to use professional service.
Can I drill a hole in a tank to drain it?
No. Drilling, cutting, grinding, or puncturing a fuel tank is extremely dangerous because vapors can ignite or explode. Use approved drainage methods only.
What should I do if I spill fuel?
Stop the transfer if safe, eliminate ignition sources, ventilate the area, contain the spill with fuel-compatible absorbents, and dispose of cleanup materials properly. If the spill is large, near drains, or unsafe to handle, contact emergency or environmental response services.
Final checklist before you begin
Before starting any Fuel Tank Drain, confirm:
- You know the fuel type.
- You know the tank design.
- You have read the service instructions.
- You have an approved fuel transfer pump.
- You have fuel-rated hose.
- You have enough approved containers.
- You are wearing gloves and goggles.
- You have a fire extinguisher nearby.
- You have spill control materials ready.
- You are working away from ignition sources.
- You have a disposal plan.
- You know when to stop and call a professional.
The Guru takeaway
The best tool for draining a fuel tank is not one item. It is a controlled system: the right pump, the right hose, the right container, the right safety gear, and the right plan.
If you are draining a small, accessible tank, a fuel-rated manual pump and an approved container may be enough. If you are dealing with a modern vehicle, contaminated fuel, a large tank, or a hard-to-access system, the tool list becomes more specialized and the risk rises quickly.
So when someone asks, “How do you drain a fuel tank?” the wise answer is: with respect for the fuel, respect for the tank, and zero improvisation. Prepare first, drain slowly, contain everything, label clearly, and never hesitate to bring in a professional when the job moves beyond your tools or comfort level.